Question:
We are presently purchasing an ingredient bag that we add to our flour to make our dough from. We would like to make this ourselves to save some money. What's the best way to do it?
Answer:
Making an ingredient bag, or "goodie-bag" (as it is better known as) is pretty straightforward.
- Begin by putting a small amount (one or two pounds) of flour into the suitably sized plastic bags or containers. This will serve to disperse the rest of the ingredients preventing possible lumping of any water-absorbing ingredients that you might be putting into the bag.
- Then weigh and add each of your other dry ingredients (salt, sugar, herbs/spices, dough conditioners, gluten and instant dry yeast) to the bag/container. Lightly stir the ingredients into the flour, or shake the ingredients together for a few seconds to blend them.
- The goodie-bag can now be sealed closed and appropriately labeled.
It is always a good idea to write-up a formula card for each type of dough made from a goodie-bag. This can be done on an index card and posted by the mixer or ingredient scaling area. Typically, it will look something like this: Add XX pounds of water at XX degrees to the mixing bowl. Then add XX pounds of flour and one goodie-bag (be sure to identify the goodie-bag) and mix at low speed for X-minutes. Add the oil and mix an additional two minutes at low speed. Then mix at second speed for X-minutes.
Some things to remember about your goodie-bags: Use only instant dry yeast (IDY) in your goodie-bags because it is designed to be added to the flour without pre-hydration. Technically, you could also use protected active dry yeast (PADY) in making goodie-bags, but this type of yeast will be more expensive. Also, it is not as readily available through our distributors as IDY. If you were to make goodie-bags that had an intended shelf life of several months, there might be some advantage to using PADY, but for most of us, we're only looking at a shelf life of a week or two at the most, and for this, IDY will work just fine.
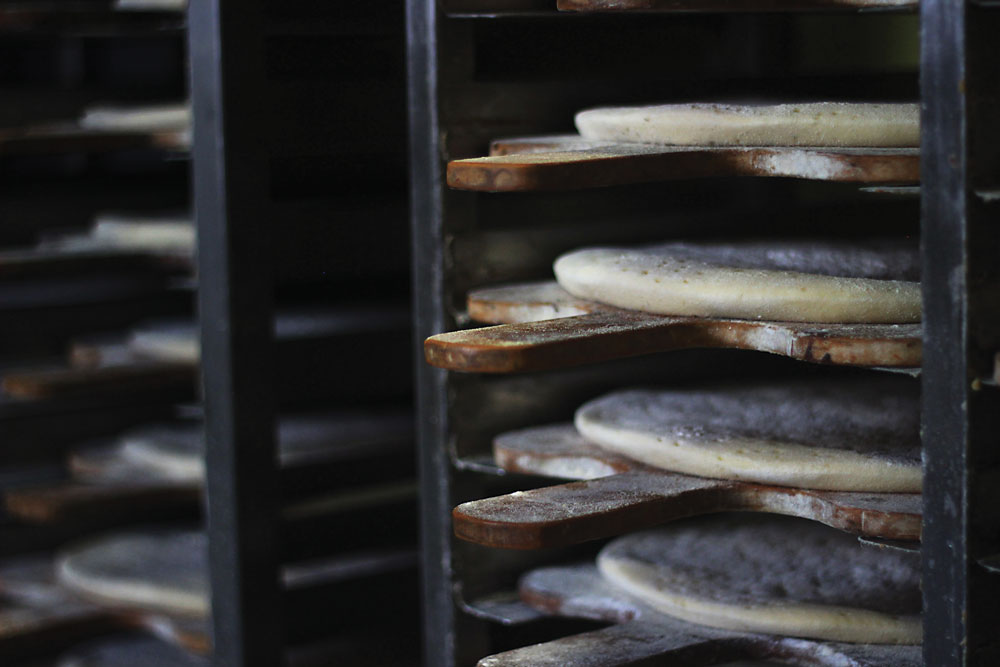
- It is not uncommon to have goodie-bags for different types of pizzas, for example, one for thin crust pizzas and one for thick crust pizzas. As the contents of the bags may be different, be sure to plainly label or identify the bags so it's obvious which bag is to be used for making which type of dough.
- If you make both thick crust pizza and thin crust pizza and you're using two different types of flour (high protein/gluten for the thin crust and a lower protein/gluten for the thick crust) you might be able to save some money and inventory space using goodie-bags. First, you will need to purchase a bag of vital wheat gluten, which is available from any bakery ingredient supplier. Your goodie-bag for the thick crust pizzas will remain unchanged.
- When making the goodie-bags for the thin crust pizza, you will include some of the vital wheat gluten. The exact amount of gluten will need to be determined, but if you know the protein content of the two flours that you're presently using it is easy to calculate the exact amount needed. For example, the high protein (thin crust) flour averages 13.5 percent protein content. The lower protein (thick crust) flour averages 12.2 percent protein content. The difference is 1.3 percent protein. By dividing 1.3 percent by 0.6 you will have the amount of gluten that will need to be added to the thick crust flour to bring it up to then thin crust flour's 13.5 percent protein content. In this example, 2.2 percent (based on the total flour weight in your dough) of vital wheat gluten will be needed. This amount of gluten should be added to the thin crust goodie-bag and the flour type used should now be the same (lower protein) as used for making the thick crust pizzas. With the added gluten in the goodie-bag, the total protein content of the flour will be increased to 13.5 percent to give the same finished crust characteristics as were had using just the 13.5 percent protein flour.
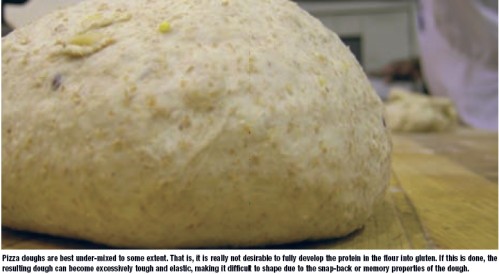
- In cases where you don't know the protein content of the two flours, you will need to use good old trial and error to find the correct amount of gluten to use. For starters, I would begin with 3 percent gluten added to the thin crust goodie-bag. If the finished thin crust is too chewy or the dough exhibits too much memory or snapback during the forming procedure, reduce the amount of added gluten to 2 percent or less. If the finished crust is too tender, increase the gluten 4 percent or more.
- A word of caution when using vital wheat gluten is in order. Be sure to disperse the gluten into the other ingredients in the goodie-bag, and remember to close the bag or container tightly. The bag in which the gluten is stored should also be folded down firmly and secured with a piece of tape to keep the bag closed when not in use. Failure to do so may result in the gluten absorbing moisture from the air leading to pilling or lumping of the gluten, rendering it unsuitable for use.

Question:
We make all of our pizzas on par-baked crusts that we make ourselves during slow time during the day and in the evenings. Depending upon business, we may keep our par-baked crusts for up to a week or more in the cooler before we use them. Occasionally, we notice a little mold growing on one of the crusts in the bag, and we discard the entire bag of 10 crusts. Is there anything that we can do to prevent the mold growth on our crusts?
Answer:
Bread type items will usually begin to show some indication of mold growth between five and seven days after baking. Refrigeration may or may not have a significant affect upon retarding the mold growth as a lot will depend upon the initial level of contamination with mold spores, moisture content/water activity of the crust, and pH (acidity) of the crust.
The most effective means of controlling mold growth is to use a mold inhibitor such as calcium propionate in the dough formulation. Calcium propionate is available from any bakery ingredient supplier. It is commonly sold under trade names such as Mycoban or Guard. No matter what the name, as long as it is food grade calcium propionate, it will work for you at inhibiting mold growth in your pizza crust.
 While some products might have specific recommendations as to the amount to use, calcium propionate is usually used in yeast leavened bread type products at levels of between 0.25 and 0.375 percent of the flour weight in your dough formula. This is equal to 2 to 3-ounces per 50-pounds of flour weight. When using calcium propionate, one must keep in mind that it is most effective when the ph (acidity) of the pizza crust is at or below 5.5. Remember that a pH of 7 is neutral and anything above that is basic (alkaline) and anything below 7 is acid. It is a simple matter to check your pizza crust to determine what the approximate pH is. Purchase a roll of litmus paper/tape from your local pharmacy. The litmus paper should have a pH range of 4.5 to 7.5 and a color comparison chart on the side of the container.
Rinse out a blender with distilled water, then fill it about half full of distilled water and put about 1/4 of a 12-inch diameter crust into the blender and puree it until smooth. Let the pureed crust-water mix set for a minute or so, and pour off several ounces into a plastic cup. Dip the litmus paper into the mixture in the cup and compare the color of the tape to the chart on the side of the tape container. Determine which color stripe most closely matches with the color of the litmus tape and read the pH for that color stripe. Ideally, you want your crust to have a pH of 5.7 or lower. A pH of 5.0 to 5.25 is considered ideal. And if it is lower than this, so much the better. If the pH indicated is higher than 5.7 you will need to add an acid. The suggested acid is regular, household, white vinegar. This is added to the dough to lower the pH of the finished (baked) crust. When adding vinegar, add it in increments of 2 percent based on the total flour weight (one pound per 50 pounds of flour) in your dough to replace an equal weight of water. Check the pH of the finished crust and make further changes if needed.
With the correct finished crust pH and calcium propionate in your dough formulation you can expect to get at least 7 to 10 days of mold free shelf life on crusts that are stored in the cooler.