 In order to make “window shopping” a little easier, you may CLICK HERE for a list of resources.
Refrigeration
Refrigeration comes in a variety of choices. First things first: new versus used. Both have pros and cons. Should you buy new equipment, you usually also buy a warranty from the manufacturer. You need to be careful with used equipment because, while cheaper, you may pay more in the long run in order to have it repaired.
You can buy used equipment two different ways, either with a guarantee or without a guarantee. If you buy it with a guarantee, you can be assured that someone’s gone over all the pieces to make sure they work. If you buy without a guarantee, you can knock some money off the price because you’re going to have to get it checked out. Even then, I’d ask for a 30-day trial period to see how well it works. Whenever possible, go with a guarantee.
Big Dave Ostrander also offered some helpful hints on keeping your walk-in refrigeration equipment from burning out too quickly. With a walk-in cooler you have an evaporator and a compressor that work together to cool the unit. Big Dave says, “Compressors tend to die—you just never know when.” He recommends installing two compressors and two evaporators so that on the hottest days no one unit is trying to cool more than it can handle. If one of the compressors breaks down, you’ve got a couple of days to get it fixed before you need to start worrying about food spoilage in your cooler. You might also want to strike up a deal with a non-competitor to store perishable food for each other when your power goes out to save on ruined food costs.
 You may also want to consider placing the compressor outside on the roof or a wall 1) for ease of repair and 2) to keep the compressor from working harder than it has to in the heat of your pizzeria. Installing a large thermometer inside the cooler in a prominent place allows you to know immediately what temperature it is. The last suggestion to increase the life of your walk-in cooler is to buy a heat alarm and set it to go off if the temperature gets above 50˚F so you’ll know when the cooler gets too warm, and you can look into possible reasons for the high temperatures.
When choosing a refrigerator and freezer for your pizzeria you should take into account the type that best fits your needs. With a walk-in refrigerator/freezer you get floor-to-ceiling refrigeration. With a reach-in refrigerator you have something that looks like a home freezer that can come with one, two or three section models and one long door or two half doors. With the reach-in, you can get a variety of storage options from wire shelves for product storage to pan slide arrangements for pans. Other kinds of freezers include counter top and under counter freezers; however, this type of refrigeration would not be anywhere near enough to service a fully functional pizzeria.
Refrigerators keep food around 38˚F and freezers keep foods frozen at 0˚F, while a blast chiller quickly cools food for storage. Refrigerators are designed to keep something that is already refrigerated cold, and a blast chiller takes food that is fully cooked and still hot and rapidly cools it down to around 38˚F within 90 minutes for storage in the refrigerator. To make it effective, the blast chiller is colder than a refrigerator, has more air circulation to aid in cooling and operates at a lower temperature (14˚F to 32˚F).
Prep Tables
Prep tables are a necessary part of your pizzeria. You can get a prep table that has built in quantity controls, such as portioning cups and scales. A prep table has refrigerated cabinets at the bottom of the unit for toppings, sauce or even dough balls. They also have refrigerated rails around the top of the table at 20˚F, which keeps any food in the tabletop pans around 38˚F. Prep tables are pretty much stationary. The only time it might need to be moved is to clean underneath it and to clean the compressor, which is found in the back of the unit.

The prep table is the hardest equipment to buy used. A refrigerator or something like that is pretty much going to work and hasn’t changed much over the years. However, the National Sanitation Federation passed a law called the NSF7 that requires all prep and deli tables to keep toppings at 41˚F or lower. They used to only have to keep them cool to 45˚F, so finding a used table that meets that requirement can be a bit tricky.
There are several ‘extras’ that you can choose to have included on your prep table. Portioning scales and garnish racks are a couple of extras. Garnish racks catch any toppings that fall off your pizza in a pan for reuse if desired or just to keep the work area cleaner. Something else to keep in mind if you end up with a refrigerated prep table is something called a flour filter. A flour filter keeps flour, which clogs airflow and can burn out compressors, out of the system. When the compressor on your prep table needs to be replaced (which it will), have it installed so that it pulls air from the back of the table and blows it out the front at knee level instead of the other way around (which is standard factory installation) to cut down on the amount of flour that it can suck in.
A prep table can cost anywhere from $2,500 to $6,000, depending on the length you order. In order to choose the right length for you, take into consideration your pizzeria. Things like the volume of pizzas produced and how many toppings you use should all be considered.
Fryers
 Fried foods can be the perfect addition to your menu; however, you’ll need to carefully weigh the different kinds of fryers. There are two main categories: the traditional deep fryers and a self-contained unit. The traditional deep fryers, while fairly cheap, need venting systems, fire suppression systems and hoods.
You can get a traditional fryer for around $600 to $1,200. However, with ducts for the ventilation of the fryer costing between $1,000 and $1,500 per linear foot, it begins to add up. If you use a self contained unit, you’ll pay around $6,000 starting out, but almost completely eliminate any risk of burns from the oil.
Fryers add so much to the menu. You could bake just about everything you fry, but 1) baking something takes close to seven minutes, while frying it takes only three, 2) you produce a restaurant quality product and 3) you’re freeing up oven space for what your ovens are setup for anyway — pizza.
Sheeters
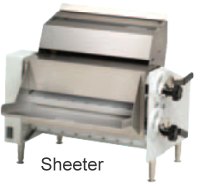 When looking at equipment in a pizzeria, one of the questions that comes to mind is if you need a dough press or sheeter or if you should hand toss your dough. Some people think a sheeter or press simply makes the dough flat and round quickly, but this is incorrect. These contraptions and hand tossing all produce different crusts.
First, let’s look at sheeters. While they quickly turn a dough ball into a flat skin, it compresses the cell structure. What happens, in simple terms, is the gasses that are trapped inside the dough are squeezed out and what you get is a cracker-like crust. Another characteristic of a sheeted dough is a flat, even skin with no raised edges. To create a raised edge the dough needs to be worked by hand. Sheeters can either form one skin at a time or create one long, ribbon-like dough from which skins can be die-cut.
Dough Presses 
The next piece of dough forming equipment is the dough press. Dough presses can either cold press or use heat to hot press the skin. Let’s look at cold pressed dough first. In order to cold press, the dough must be softer than normal doughs. The result is that the dough’s gas structure is not affected as much and you get a more open internal crumb structure, much like bread. The dough must also be pressed out in the same lightly-oiled pan it is baked in. Another characteristic, like sheeting, is that the dough doesn’t really have any defined edge.
When talking about cold pressing, the oil on the pan actually gives the crust a unique fried bottom characteristic that is impossible to achieve by any other forming method where the dough is not baked in a pan or tray. Cold pressing is a very popular forming method for focaccia bread, where the uniform, round cell structure is desirable, and the soft dough contributes to a uniformly flat cross section. In almost all cases where the cold press is used, the dough is pressed twice to ensure that it is the full diameter of the pan. It is then allowed to proof (rise) for anywhere from 20 to 60 minutes to achieve the desired crust height/thickness.
Next, let’s talk about hot presses. What’s the difference? Hot pressing requires the dough be formed using pressure AND heat. In most cases the heat comes from the bottom and top of the press. Some presses only use top heat in the pressing process, which leaves the bottom of the skin sticky and requires that it be placed in a pan and pressed into shape. One of the things about a crust that has been hot pressed is that is exhibits a certain level of crispness created by the heat applied to the skin that really can’t be created in other forms of dough forming.
A hot pressed dough, unlike cold pressed and sheeted dough, does have a nice defined edge. Because the dough is formed with heat, it doesn’t “snap back” like the elastic characteristics of sheeted and cold pressed. The crumb structure tends to be coarse and open and has a nice uniform cooking characteristic.
If you would like to learn more details about sheeted, cold pressed and hot pressed doughs, read Tom Lehmann’s article, Pressed, Sheeted, or Hand-Tossed: All Doughs are Not Created Equal… , located online at https://www.pmq.com/mag/2002summer/doughformer.shtml.
Griddles
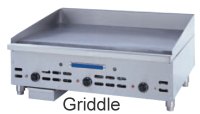 Griddles can be an essential part of a pizzeria too. They can be used to grill chicken, eggplant, sausages, sandwiches and other non-pizza items or be used to keep pots of sauces or meatballs warm. They are multi-purpose tools in a pizzeria. Some of the key points to look for are utility type, size, control type, surface finish and thickness.
To begin with, let’s explore utility type and control type. Utility type refers to the energy source. Your two basic choices are gas or electric. Places like some malls and airports don’t allow gas. While electric griddles burn ‘cleaner,’ gas griddles are less expensive to operate and cook faster. Control type refers to the manner in which heat is applied or maintained. For this you have manual, thermostatic, snap-action or solid-state. Manual controls are less expensive and simple, but can be difficult to maintain at a precise temperature. Thermostatic controls act like a cruise control. They are more consistent at maintaining temps, but the downside is their ability to recover when heavy product loads are applied. Snap-action controls have a full-on or full-off action. They provide maximum temperature consistency, quick recovery and are preferred by chains because of food safety issues. Solid-state controls are similar to snap-actions with even greater consistency, but you pay more for this option.
When you ask about styles, griddles come in either floor or countertop models. Floor models usually have oven bases and provide additional cooking and holding capacity. Countertop models usually can be placed on top of refrigerated units so the cook has everything he or she needs right there in one spot.
Griddle surfaces usually come either smooth or grooved and are either polished or chrome plated. Flat and polished surfaces are the most common. Grooved surfaces, on the other hand, can provide those grill marks that smooth surfaces can’t and can channel grease or drippings into a catch pan. Chrome finished have superior cleaning characteristics and less heat radiation, but you must take great care in maintaining the surface because once they become scratched or damaged, the ease of cleaning goes out the window.
Good griddles have a top plate that is at least one-inch think, but you can also get them in half-inch thicknesses. The thicker plates require a longer time to pre-heat, but recover faster and last longer. The thinner plates have a tendency to warp after time and heavy use and aren’t as durable.
Mixers 
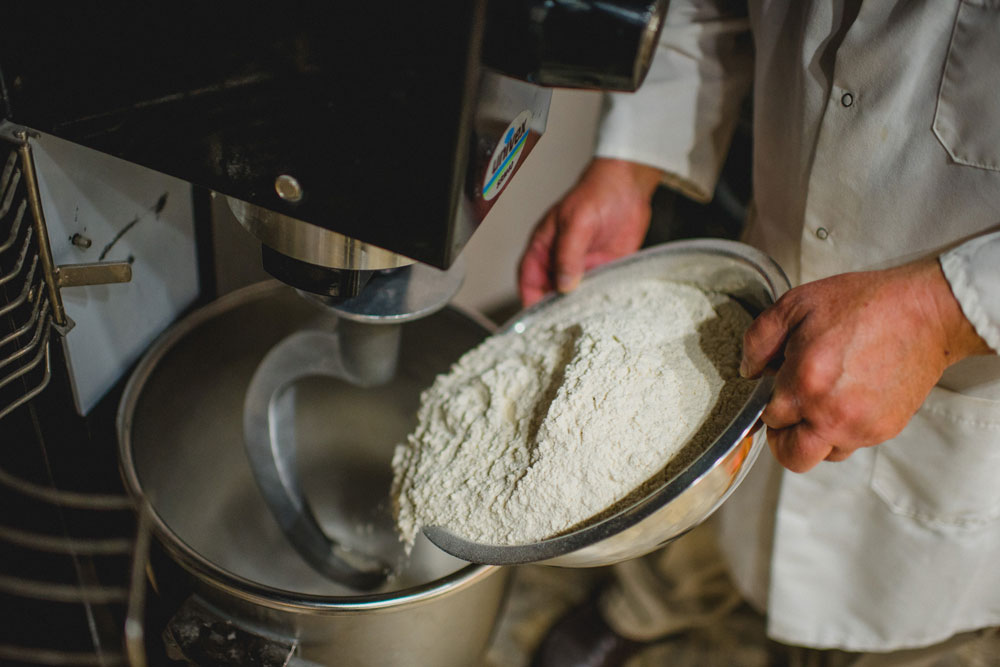
In order to produce the amount of dough needed for pizzas, a mixer is almost necessary. Many companies either offer a mixer built to mix pizza dough or have models that are capable of mixing pizza dough. Pizza dough mixers have slower speed settings so that the heat generation is kept to a minimum. These powerful mixers have more torque to stir the tougher pizza dough.
The average pizzeria that makes its own dough needs at least a 60-quart mixer. There are three types of mixers—planetary, spiral and vertical cutter mixers.
Spiral Mixers
The spiral mixer has a large bowl and an agitator that looks like a giant corkscrew. These are excellent for mixing dough, but that is all they are capable of doing. Most still don’t have an attachment hub to allow for the use of auxiliary equipment such as a grinder, shredder, slicer and chopper. When you have a spiral mixer, you will in all probability need to have another mixer to allow you to mix your sauce, grate your cheese or prepare vegetable toppings.
When buying a spiral mixer, make sure that it has a plastic drain plug in the bottom of the mixing bowl. Also, remember to get a bowl sized to the capacity you need it for because they are not interchangeable. Spiral mixer bowls come in sizes to hold 50, 100, 200 or 300 pounds of flour.
These types of mixers can be very expensive. The advantage of the spiral mixer is that it generates less heat in the motor. This is ideal for operations making massive amounts of dough. The larger operator who is looking to turn his or her store into a commissary to provide dough to satellite stores might be better served with a spiral design mixer.
Vertical Cutter Mixers
This is a mixer that looks similar to a blender. It mixes at a high speed with agitator speeds at about 1,700 rpm. The dough mixing times for vertical cutters is between 75 to 120 seconds. This is great if you like to mix your dough fresh during the day. This type of mixer can also be used to grate cheese, but is not recommended for sauces because they are abusive on the chunkier tomato products.
The important thing to look for when purchasing a vertical cutter is that you get the right mixing attachments. There are several different types of attachments. As a rule, the sharper attachments are designed for cutting and shredding while the dull/blunt, straight attachments are designed for mixing dough. The bowls are smaller on the vertical cutter, but the speed makes up for this smaller bowl capacity. With a VCM you can make several smaller batches in the time it takes to make a single large batch.
Planetary Mixers
Most pizzerias use a planetary mixer. A planetary mixer consists of a large bowl for ingredients and a dough hook agitator that stirs the dough and generally an attachment hub for driving a grater or grinding equipment. The planetary action causes the agitator to move in a figure-eight motion, solving the problem of having a clump of ingredients in the middle of the bowl and allowing the dough to uniformly mix. The dough hook grabs the dough and makes it into a smooth ball. A 60-quart planetary mixer is sufficient for most regular operations that are making a batch at a time.
Planetary mixers are capable of doing much more than mixing dough. The agitator is removable, making this type of mixer ideal for mixing anything from sauce to sweet dough to cutting the fat into a pie or biscuit dough. The planetary design mixer has been the workhorse of the pizza industry for over 50 years and still continues to be the most popular type of mixer used. Many of the planetary mixers are equipped with an attachment hub to allow for the use of a grinding or shredding attachment, which can greatly increase the versatility of the mixer.
There are two major things to look for when deciding on a planetary mixer: a stainless steel bowl and a dough hook designed to keep the dough from riding up to the top of the hook. If you don’t go for the stainless steel bowl, your sauce could end up metallic tasting. The dough hook that doesn’t allow the dough to ride up is very important because if you don’t have this you’ll be cutting dough off the hook every few minutes. Make sure that when you are looking at mixers they have an attachment hub.
Mixer Maintenance
Regardless of what type of mixer you decide on, it’s important that you know how to service the mixer. You will get the maximum service life from the mixer with the lowest repair cost. And, while you’re installing it, make sure it’s wired correctly with the agitator rotating in the direction for which it was designed.
Food Processors 
The food processors used in the restaurant industry are used to slice and dice as opposed to purifying and liquefying. A food processor is an important piece of equipment because of the time it saves. A good food processor can grate cheese, chop vegetables and slice meat toppings in just a couple of minutes. The time and labor saved by using a food processor can make up for the cost in under a year for many operations. For instance, if a pizzeria is using 15 pounds of onions per day, a prep person chopping them by hand takes 14 minutes. A food processor can do it in two minutes. This adds up to about $350 in labor a year (for a person making minimum wage) just to chop onions.
A food processor is a good piece of equipment to have if you have a salad bar or use lots of vegetables in pasta dishes and on your pizzas. The major advantage is that you can do prep once a day instead of three times a day as you would if you did it by hand. With a food processor, your cuts are uniform, giving you more consistency in appearance and cooking time. This lends to better quality ingredients and cost-effectiveness. When you slice fresh ingredients you keep flavor and juices that are lost in pre-sliced items.
By using a food processor, your shelf life for vegetables and other ingredients is longer due to the clean cuts. By using a processor, you also diminish safety issues of having employees use knives. Sanitation is also increased because the food is less likely to make contact with outside surfaces.
Slicers
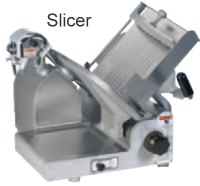 For a pizza shop that also does sandwiches, a slicer is a valuable tool for three reasons: freshness, thinness and portion control. The thinner the slice of meat is, the more cellular structure is exposed. This gives the most flavor and tenderness.
There are two types of slicers available, manual and automatic. The automatic slicer is more expensive, but pays for itself quickly when slicing in bulk. However, a hand slicer is better for basic pizza operations doing sandwiches because it is less costly and not used as much.
Another thing to look for in a slicer is what it is made of. A slicer made of aluminum is more likely to have lots of pits and voids in the casting that can harbor bacteria. Use a stainless steel slicer because the chance for contamination is much lower. You can’t afford the growth of bacteria. If you do use a slicer, regardless of the material it’s made from, it’s extremely important that your staff is trained to clean it properly because the risk of bacteria growth is so high.